

Blogs
What Is a Dieline? Packaging Design and Print Guide

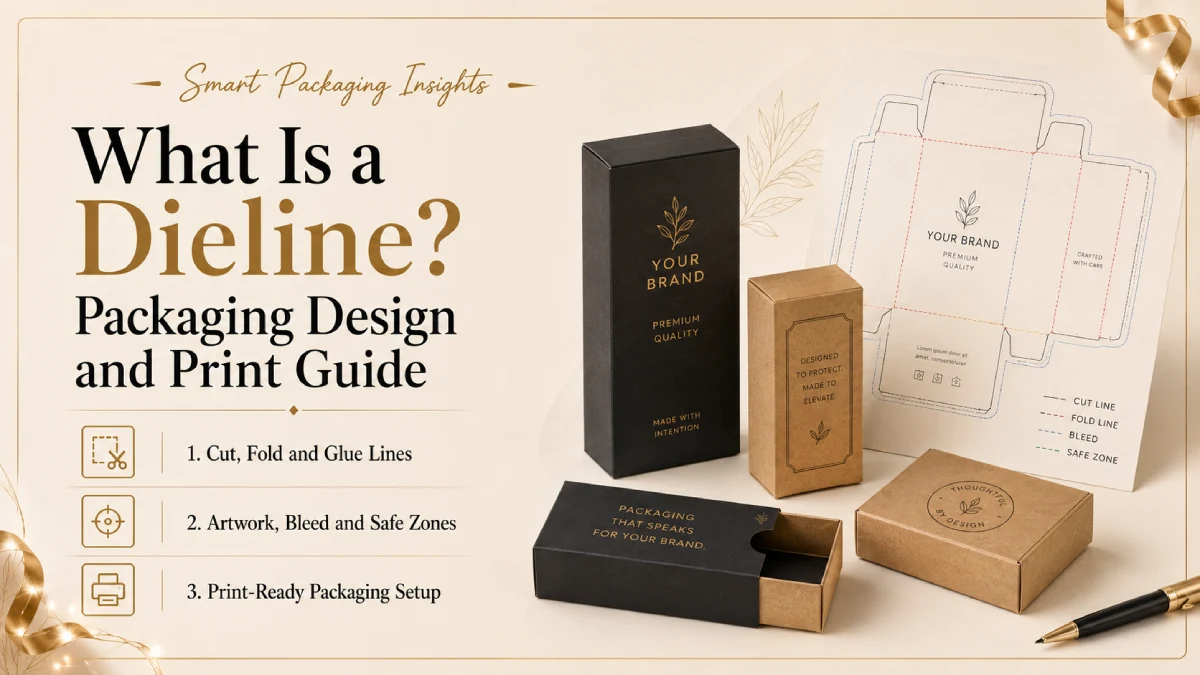
A dieline is one of the most important parts of custom packaging design. If you have ever ordered custom boxes, product packaging, mailer boxes, folding cartons, retail boxes, or printed packaging, you have heard the artwork on the dieline.
A dieline is the flat layout or blueprint of a package. It shows where the packaging will be cut, folded, creased, glued, trimmed, and printed before it becomes a real box. Think of it like a map for your packaging. Before a box becomes 3D, it starts as a flat sheet. The dieline shows how that flat sheet will turn into the final box shape.
Without a proper dieline, your logo may appear on the wrong panel, text may get cut off, folds may run through important artwork, or the final box may not assemble correctly. That is why understanding what a dieline is matters for brands, designers, ecommerce sellers, startups, and anyone ordering custom packaging.
What Is a Dieline?
A dieline is a two-dimensional packaging template that shows the structure of a box or printed package before it is produced. It tells designers and manufacturers where to cut, fold, crease, glue, and place artwork. Little Rock describes a dieline as a design blueprint that outlines the exact layout of packaging, while Black Bird Packaging explains that it helps confirm packaging layout and dimensions before production.
A dieline includes:
- Cut lines
- Fold lines
- Crease lines
- Bleed area
- Safe zone
- Glue tabs
- Trim lines
- Perforation lines
- Window cutouts
- Panel areas
- Barcode space
- Special finish areas
The dieline is not usually printed on the final box. Instead, it acts as a production guide. Designers place artwork on the dieline so the supplier knows exactly how the final package should look after cutting, folding, and assembly. In simple words, a dieline turns packaging design into packaging production.
Why Dielines Matter in Custom Packaging?
Dielines matter because packaging is not flat when the customer sees it. A box has front panels, back panels, side panels, flaps, lids, bottoms, glue areas, folds, and hidden sections. If the artwork is not placed correctly, the final box can look wrong.
A dieline helps prevent mistakes such as:
- Logo placed on the wrong panel
- Text too close to the cut edge
- Artwork missing bleed
- Barcode placed on a fold
- Design printed over glue tabs
- Important details hidden after folding
- Pattern not aligning across panels
- Box not folding correctly
- Wrong product fit
- Production delays
For small businesses, these mistakes can be costly. A wrong dieline can lead to reprints, wasted material, delayed orders, and packaging that does not look professional.
Dieline vs Box Template: Understand the Terminology
A dieline and a box template are closely related, but they are not always the same in everyday use.
- A box template is often the ready-made structure or layout for a specific box style. For example, a mailer box template, tuck-end box template, sleeve box template, or gable box template.
- A dieline is the production-ready drawing that shows the exact cut, fold, glue, and bleed areas for that box.
In many packaging projects, people use the words together. A packaging supplier may send you a “dieline template,” meaning a box layout file where you can place your artwork.
The difference between them is very simple: box template is the general layout or structure of the box, while the Dieline is the technical production guide that shows how the box will be cut, folded, and printed.
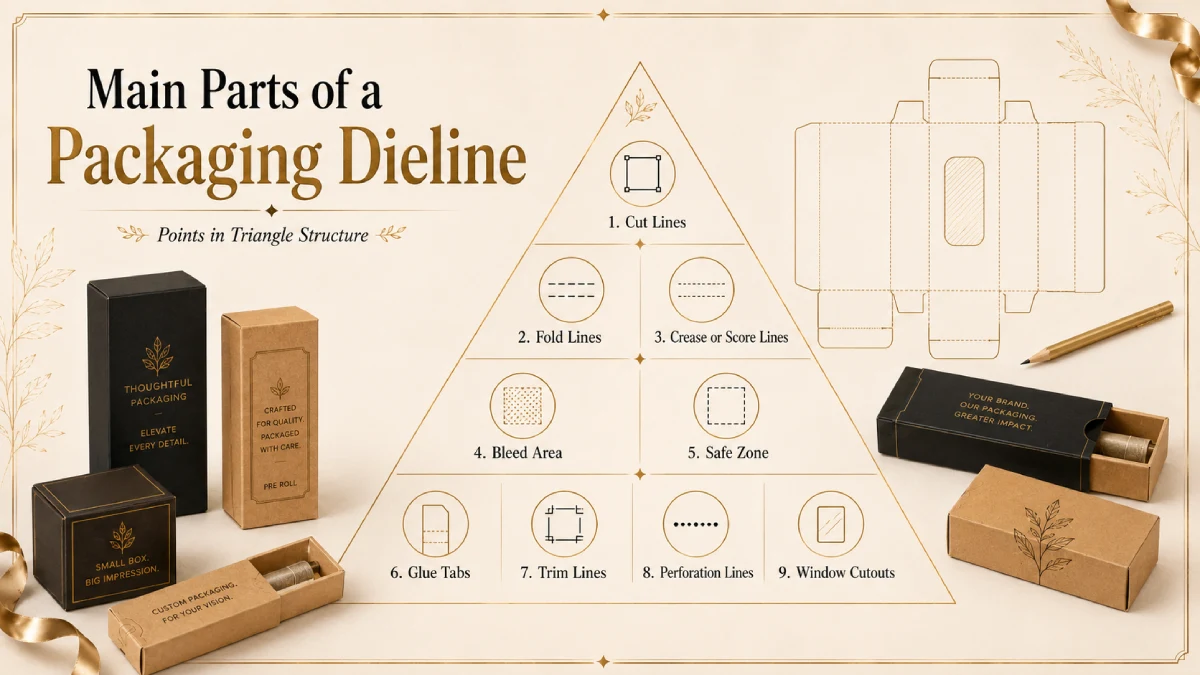
Main Parts of a Packaging Dieline
A dieline looks confusing at first, but once you understand the parts, it becomes much easier to read.
Cut Lines
Cut lines show where the packaging material will be cut. These lines define the final shape of the box, sleeve, label, card, or package. If artwork crosses outside the cut line without proper bleed, it may be trimmed off.
Fold Lines
Fold lines show where the material will fold. These are important because a design element placed over a fold may become distorted or hard to read.
Crease or Score Lines
Crease lines show where the material will be scored so it can fold cleanly. This is especially important for thicker board, corrugated boxes, mailer boxes, and folding cartons.
Bleed Area
Bleed is the extra artwork extended beyond the cut line. It prevents white edges from appearing if the cutting shifts slightly during production. Netpak’s artwork guidelines also emphasize extending bleeds beyond trim lines as part of print-ready packaging setup.
Safe Zone
The safe zone is the area where important text, logos, and barcodes should stay. Anything too close to the cut line may get trimmed or look badly placed. Some print-ready artwork guides recommend keeping critical text and logos a few millimeters away from cut lines.
Glue Tabs
Glue tabs are the areas used to assemble the box. Do not place important artwork, text, barcodes, or logos on glue tabs because they may be hidden or covered during assembly.
Trim Lines
Trim lines show where the final cut is expected. They help designers understand the final edge of the packaging.
Perforation Lines
Perforation lines show where the package may tear or open. These are common in tear strips, display boxes, mailer boxes, and retail packaging.
Window Cutouts
Window cutouts show where a transparent window or open area will appear. These are common in bakery boxes, soap boxes, candle boxes, toy boxes, and retail display packaging.
How to Read a Dieline
A dieline is not just a drawing. It is a production instruction sheet. To read a dieline, first identify the box panels. It is best to look for the front panel, back panel, side panels, top flap, bottom flap, glue tab, and any locking flaps. The second phase is to check the line types. Most dielines use different line colours or styles for cut lines, fold lines, bleed, safe zones, and special finishes.
The third one is to identify the artwork areas. Not every panel is equally visible after folding. Some flaps may be hidden inside the box. After that, check orientation. Some panels may appear upside down on the flat dieline because of how the box folds. Finally, check whether your important design elements stay inside the safe zone.
How to Prepare Artwork on a Dieline
When preparing artwork on a dieline, the first rule is simple: do not change the dieline structure unless the supplier tells you to.
Little Rock experts recommend keeping the artwork on a separate layer from the dieline template layer. This helps keep the production lines separate from the printed design.
A good artwork file should usually include:
- Dieline layer
- Artwork layer
- Bleed area
- Safe zone
- CMYK colour setup
- High-resolution images
- Outlined or embedded fonts
- Correct barcode placement
- Separate finish layers
- Supplier-required file format
Before sending artwork to a packaging supplier, check that the design matches the final box size, the logo is on the correct panel, and all important text is readable after folding. A beautiful design can fail if it is placed incorrectly on the dieline.
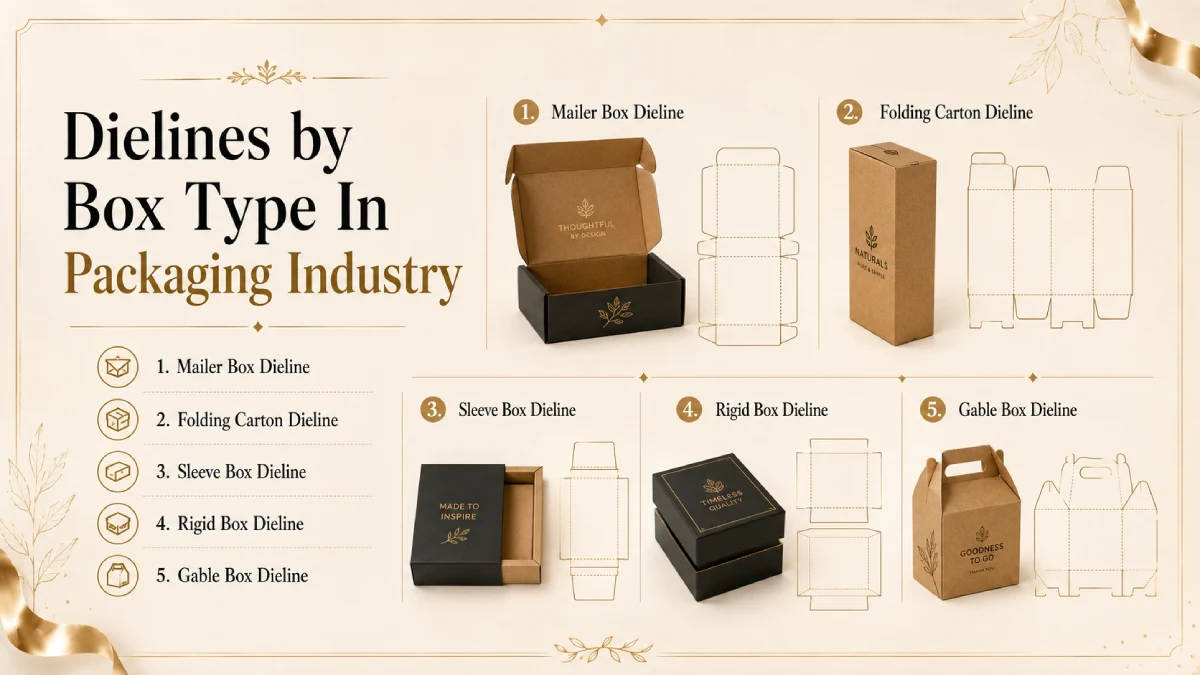
Dielines by Box Type In Packaging Industry
Different box styles need different dielines. A mailer box dieline does not look like a folding carton dieline. A sleeve box dieline does not look like a rigid box dieline.
Mailer Box Dieline
A mailer box dieline usually includes the base, lid, side walls, locking tabs, dust flaps, and tuck-in areas. Mailer boxes are common for ecommerce, subscription boxes, clothing, skincare, candles, and gift packaging.
Folding Carton Dieline
A folding carton dieline usually includes front, back, side panels, top flaps, bottom flaps, and glue tabs. This style is common for cosmetics, food, tea, soap, medicine, skincare, and lightweight retail packaging.
Sleeve Box Dieline
A sleeve box dieline usually wraps around an inner tray or product. It needs accurate panel alignment so the sleeve slides smoothly and the artwork lines up correctly.
Rigid Box Dieline
Rigid box dielines can be more complex because rigid boxes often include wrapped board, lids, bases, inner trays, and specialty finishes. They may require extra planning for paper wrap, corners, inserts, and thickness.
Gable Box Dieline
A gable box dieline includes body panels, handle panels, locking flaps, and roof-style folding areas. This structure is commonly used for food, gifts, hospitality packaging, and event giveaways. Each box style has its own structure. That is why using the wrong dieline can create serious production problems.
Important Point: Before creating a dieline, confirm the correct box measurements and learn how to write packaging dimensions in the proper length, width, and depth order.
Why You Should Not Use a Random Dieline
Little Rock and its representative team offer dieline templates, and they can be helpful for learning or early design practice. But for real production, you should use a dieline from your actual packaging supplier. Because every box depends on size, material thickness, flute type, closure style, glue area, folding tolerance, printing method, and machine setup.
A random dieline may not match your supplier’s production process. It may also have wrong panel sizes, weak flap design, poor fold placement, or missing bleed. For rough concepts, a free dieline is fine. For final printing, use the supplier-approved dieline.
Dielines and Custom Box Sizes: Branding and Finishing
Custom box sizing is one of the main reasons dielines matter. A box fit the product correctly. If the dieline is too small, the product may not fit. If it is too large, the product may move around and look poorly packed.
Before creating a dieline, measure:
- Product length
- Product width
- Product height
- Product weight
- Insert space
- Padding space
- Material thickness
- Closure style
- Shipping needs
- Retail display needs
For example, a candle box may need extra room for an insert. A skincare bottle may need space for the cap. A bakery box may need height clearance for decoration. A jewelry box may need a soft insert. The dieline should be built around the real product, not guessed from a similar box. Good packaging starts with accurate measurement.
Dielines and Branding
A dieline helps branding look correct on the final package. Without a dieline, you may not know which panel is the front, which panel folds inside, and where the customer will see your design first.
A dieline helps place:
- Logo
- Product name
- Tagline
- Barcode
- QR code
- Ingredients
- Directions
- Warning text
- Social media handle
- Website
- Product image
- Pattern design
- Inside message
For ecommerce boxes, the inside flap may be a great place for a thank-you message or QR code. For retail boxes, the front panel should clearly show the product name and key benefit. For food, cosmetic, and skincare packaging, label information needs enough readable space. Branding is not only about looking good. It must be placed where customers can actually see and use it.
Dielines and Special Finishes
If your box has special finishes, the dieline should show them clearly.
Special finishes may include:
- Foil stamping
- Embossing
- Debossing
- Spot UV
- Window cutouts
- Perforation
- Tear strips
- Raised textures
- Varnish areas
- Die-cut shapes
These finishes usually need separate layers or special markings in the artwork file. For example, foil stamping should not be treated like normal printed artwork. It may need a separate spot colour layer to show the printer exactly where the foil should appear.
Common Dieline Mistakes to Avoid in Dieline
One common mistake is deleting the dieline layer from the artwork file. Another mistake is flattening all layers together so the printer cannot separate artwork from cut and fold instructions. Some designers place text too close to cut lines. This can cause important details to be trimmed. Another mistake is forgetting bleed. Without bleed, the final package may show white edges after cutting. The Important point to remember that dieline mistakes may look small on a screen. But they can become expensive in production.
Summary of the Article
A dieline is the flat production blueprint used in packaging design. It shows cut lines, fold lines, crease lines, bleed, safe zones, glue tabs, and artwork placement before a box is printed and assembled. Dielines help custom packaging manufacturers, designers, and business owners avoid production mistakes and create accurate packaging for mailer boxes, folding cartons, sleeve boxes, rigid boxes, gable boxes, retail boxes, and product boxes.
Frequently Asked Question
What is a dieline in packaging?
A dieline is a flat 2D packaging template that shows where a box or package will be cut, folded, creased, glued, and printed before production.
Why is a dieline important?
A dieline is important because it helps designers and manufacturers place artwork correctly, avoid cutting or folding mistakes, and produce packaging that assembles properly.
What should be included in a dieline?
A dieline usually includes cut lines, fold lines, crease lines, bleed areas, safe zones, glue tabs, trim lines, perforation lines, window cutouts, and special finish areas.
Do I need a dieline for custom boxes?
Yes, custom boxes usually need a dieline so the designer and manufacturer know exactly how the artwork should fit the box structure.
Can I make my own dieline?
You can create your own dieline if you understand packaging structure, measurements, folds, material thickness, and production requirements. For final printing, it is safer to use a supplier-approved dieline.
What software is used for dielines?
Adobe Illustrator is commonly used for packaging dielines because it supports vector lines, layers, spot colours, and print-ready artwork.
What is bleed on a dieline?
Bleed is the extra artwork that extends beyond the cut line. It helps prevent white edges after the package is trimmed.